Options for attaching/detaching tags to/from hospital assets.
The portal has multiple options for attaching, detaching, and replacing tags.
Best Option! Replace Tag
Unless you are permanently removing a tag from an asset (such as when sending broken equipment out for repair or replacement), the Replace Tag option on Asset Details is the most efficient method to detach and re-attach a tag. Locate the necessary asset either in My Site or on the map. Use click to see more from map's right menu with a selected asset or click the Asset ID link in My Site.
The asset must have a status of Attached for Replace Tag option. If the tag has a status of Unattached, the button reads Attach Tag.


Enter the new tag number in the Tag ID field. Note the message regarding tag detachment of old tag. Click Next. Custom fields are already set since the asset was already attached and logged in portal. Verify and choose Submit.
Once saved, the asset is attached to the new tag; the old tag changes to a status of Unattached.
Attach Option 1: Asset Details
If an asset has a status of unattached, the option will be to Attach Tag (rather than replace). Choose that option.

Use Attach Tag window to input valid (and operational) tag ID. The Asset ID field is auto-populated with the Asset ID from Asset Details. Click Next. 
Set the custom properties for the asset to ensure that assets can be easily searched for using a variety of data and identifying information. The more details, the easier it is to locate the asset and to track data that may impact business operations.
 Click Submit when complete. The asset and tag information is updated across the portal and out to the mobile app.
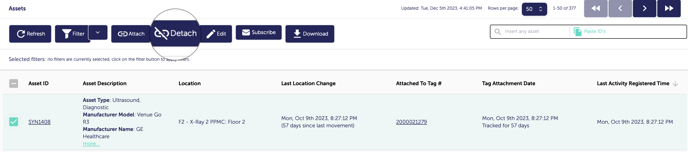
Attach Option 2: My Site Assets
Open the Assets tab in My Site and either place a checkmark next to a specific unattached asset or leave all the checkboxes blank (no selection) and click the Attach button on the Assets menu.
By default, the Assets tab does not show assets with a status of not attached. Use the filter option (filter by Status then filter value Not Attached) to list only unattached assets.

The Attach Tag settings open. If there was an asset selection from the Assets tab, the asset ID will auto-populate in the Asset ID field. If no asset was selected, both fields will be blank. The attach workflow follows the same as Option 1.
Attach Option 3: My Site Tags
Open the Tags tab under My Site. You may use filter or search to look up and attach a specific tag (must have status of not attached). Select Attach from the Tag menu with either no tag checked or a specific tag selected. Ensure a sufficient battery level in the selected tag.
If there was a tag selection from the Tags tab, the tag ID will auto-populate in the Tag ID field. If no tag was selected, both fields will be blank. The process to add asset details continues as described in Attach Option 1. Once complete, the tag/asset attachment is updated across the portal and in the mobile app.
Detach Option 1: Asset Details
Use this option to detach a tag from an asset without replacing it (e.g., equipment permanently broken). Open the Asset page under My Site. Locate the asset and tag that need to be detached from one another. Click the Asset ID link to open Asset Details. From the Details page select Detach Tag.

Confirm or cancel the process in the pop-up window. Once detached, the association with the asset is removed and the asset can no longer report to the Cognosos portal. Attach or replace the tag in the system of the equipment will still be in use.
Detach Option 2: My Site Assets
From the Assets tab under My Site, select an asset from the Assets list and select Detach from the menu. The system allows only one asset-tag detachment at a time so a single selection must be made. Otherwise, the button will remain grayed out.
In the Detach tag pop-up window, the Asset ID field will have the tag number for the asset selected. You may leave the Tag ID field blank. Click Confirm.
Once detached, that tag will appear in the portal with a status of Not Attached. This operation removes the association between the tag and the asset; therefore the asset is no longer trackable until a new tag is associated to the asset in the portal via a new attach tag action.
Detach Option 3: My Site Tags
Open the Tags tab under My Site. You may use filter or search to look up a specific tag. Select the correct tag from the Tags list. Click Detach in the Tag menu. You must make a selection or the button remains grayed out.
Select Confirm in the Asset Detachment pop-up window to continue. Otherwise select Cancel to return to the Tags list without making changes.
Once detached, that tag and asset will no longer be connected for location services and data gathering purposes. Attach a new tag to maintain location and information services for the equipment.